做为一个前端开发者,要是连npm包也没用过那也是太low了,我们知道,我们用到的npm包实际上也是别人开发发布上去的,那我们如何去发布自己的npm包呢
我们知道,在开发微信小程序的时候,每个页面对应的文件放在一个文件夹下,这个文件夹的名字和里面文件的文件名都要一样,而每次写一个新的页面我们都要先创建一个文件夹,再按这个文件夹的名字来创建wxml,wxss,js,json文件,万一写错了还会报错,这里写一个generator来完成这个创建工作
编写generator
新建一个文件夹generator-wxfile
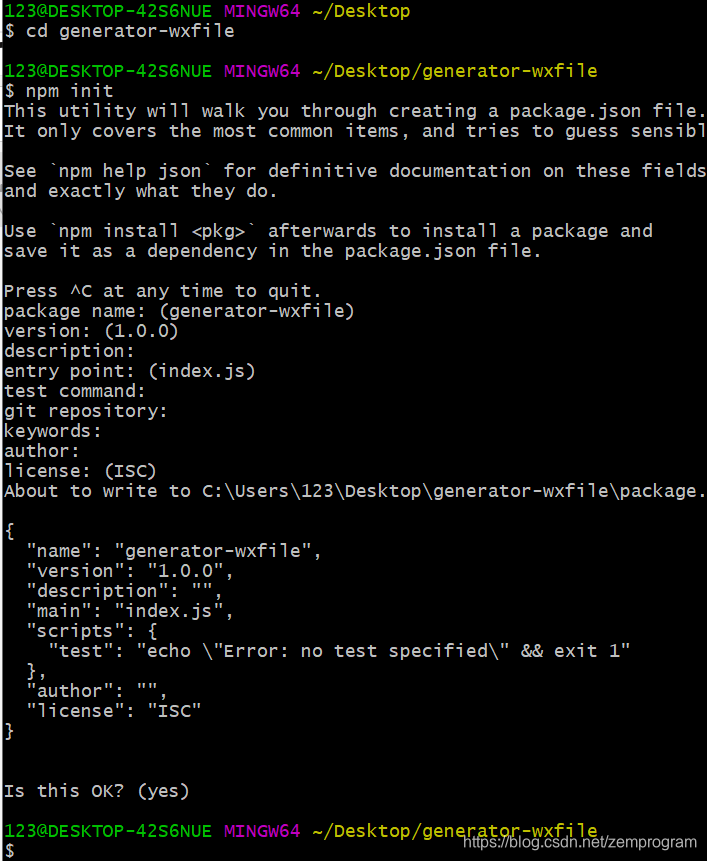
npm init初始化内容,一切选项按默认的来

接下来下载npm包yeoman-generator
创建如图目录

templates中存放的是模板文件,就是我们最终要放到本地的文件的模板,,我们看看基础的模板文件需要什么,wxml和wxss不需要什么东西,我们在json文件内写入一个{}
在js文件里写入各个生命周期函数,这里的第3行<%= fileName%>是用了ejs语法,用来标识文件名
1
2
3
4
5
6
7
8
9
10
11
12
13
14
15
16
17
18
19
20
21
22
23
24
25
26
27
28
29
30
31
32
33
34
35
36
37
38
39
40
41
42
43
44
45
46
47
48
49
50
51
52
53
| Page({
data: {
text: "This is <%= fileName%> data."
},
onLoad: function(options) {
},
onShow: function() {
},
onReady: function() {
},
onHide: function() {
},
onUnload: function() {
},
onPullDownRefresh: function() {
},
onReachBottom: function() {
},
onShareAppMessage: function () {
},
onPageScroll: function() {
},
onResize: function() {
},
onTabItemTap(item) {
console.log(item.index)
console.log(item.pagePath)
console.log(item.text)
},
viewTap: function() {
this.setData({
text: 'Set some data for updating view.'
}, function() {
})
},
customData: {
hi: 'MINA'
}
})
|
接下来编写index.js文件,引入yeoman-generator模块,输出一个generator模块,具体的generator构建看前端工程化 通过yeoman-generator将文件加载到本地,这里再引入一个fs模块用于创建文件夹
1
2
3
4
5
6
7
8
9
10
11
12
13
14
15
16
17
18
19
20
21
22
23
24
25
26
| const Generator = require("yeoman-generator")
const fs = require("fs")
module.exports = class extends Generator{
prompting(){
return this.prompt([{
type:"input",
name:"fileName",
message:"your file name is",
default:"page"
}]).then(answer=>{
this.answer = answer
})
}
writing(){
const fileName = this.answer.fileName
const tempFile = ["fileName.js","fileName.json","fileName.wxml","fileName.wxss"]
.map(path=>this.templatePath(path))
const outputFile = [`${fileName}/${fileName}.js`,`${fileName}/${fileName}.json`,`${fileName}/${fileName}.wxml`,`${fileName}/${fileName}.wxss`]
.map(path=>this.destinationPath(path))
fs.mkdirSync(fileName)
for(let i=0;i<tempFile.length;i++){
this.fs.copyTpl(tempFile[i],outputFile[i],this.answer)
}
}
}
|
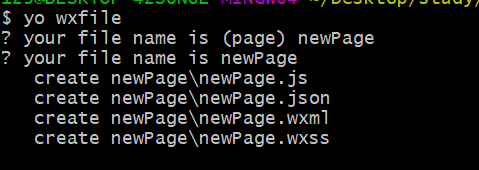
执行npm link,将模块链接到全局,在本地测试一下,新建一个文件夹执行yo wxfile

这样就创建成功了,而且查看js文件,发现第三行的text的值变成了”This is newPage data.”
发布到npm上
执行npm publish就可以发布了,下面这样就是发布成功了

当然,也可能会遇到踩坑的情况,可以看下npm publish发布时的踩坑记录
到这里就发布成功了,可以通过npm i generator-wxfile@1.0.0 -g来将这个generator下载到全局使用,也可以先下载我的试试看和你做的效果是不是一样
上面说的是1.0.0版本的功能,后面我会对这个npm包做一些修改
在1.0.1版本中,我在添加文件的同时,将相应的路由写入了app.json文件的pages属性中,但是yo wxfile要在app.json文件所在的目录执行
后面的版本还在持续更新中


